What is Commando VM?
Commando VM is a testing platform that Mandiant FireEye created for penetration testers who are more comfortable with the Windows operating system.
Essentially, Commando VM is the sister to Kali, a Linux testing platform widely used throughout the penetration testing community. These testing platforms are packaged with all the common tools and scripts that testers utilize during an engagement. Testers can install Commando VM on Windows 7 SP1 or Windows 10, and the program is easily accessible on GitHub.
Why is this important?
Understanding what these testing platforms are and how to use them is important for both red and blue teamers. When working with customers, a common question I ask is if they’re familiar with tools like Mimikatz or Bloodhound. Surprisingly enough, many customers are not. This fact is somewhat concerning to me, as a central idea I learned in school is that thinking like an attacker is essential to protect yourself from attacks. How better to think like an attacker than to use all the tools they might leverage against you and the environment you’re attempting to secure?
Commando VM makes it easy to think like an attacker. It’s packaged with the latest and greatest tools and scripts to assist in a blue team’s education on how they work.
What can it be used for?
Commando VM is packaged with many tools for various purposes . Some of the categories that Commando VM can assist with are:
- Information gathering
- Exploitation
- Web application testing
As soon as you install Commando VM, all the tools listed below become available for use.
Information Gathering
Information gathering is a major part of assessing your environment. Identifying what is exposed to an attacker without privileges is key to understanding what you need to lock down and secure. Just know: if you can see it with some of these tools and scripts, so can they.
- Nmap – Scanning and enumerating are key to understanding the environment. Results of Nmap scans can determine what hosts are available on the network, what services those hosts run , and which ports are open on those hosts.
- BloodHound – Scanning an Active Directory environment and understanding complex attack paths that may exist due to permission configurations is something all blue teamers must do . A tool like Bloodhound helps you identify where these paths exist, and efficiently prioritize remediation steps.
Exploitation
Once you’ve done some reconnaissance, the next step is to try exploiting the things you’ve found. For example, if you’ve identified that sessions existed on a certain machine or permissions existed for a certain user, there are tools for leveraging those permissions or sessions to your advantage.
- Invoke-ACLpwn – This tool leverages some of the functionality in Bloodhound to discover the existing permission relationships t in AD. It will discover these permissions and automatically try to exploit them in a chain to escalate privileges all the way to Domain Admin.
- Mimikatz – This tool exploits Windows and Active Directory, which is most commonly used for attacks like Pass-the-Hash or DCSync. Session enumeration done through information gathering may result in identifying a target to leverage for privilege escalation. If an administrative or more privileged user has a session on a machine you have access to, you can use Mimikatz to access their account and either escalate or move laterally throughout the environment.
Web Application Testing
If your company or environment uses internal web applications, it’s in your best interest to run penetration tests. Once someone gets in your environment, if they find that these applications exist, it would be simple for them to use Commando VM tools to find vulnerabilities. This lesson is pivotal, as some of the easily found vulnerabilities can be addressed before any official engagement.
- Burp Suite – this tool assists in finding and exploiting vulnerabilities in a web application. Simply setting up a proxy/listener while you navigate all your application’s web pages allows you to kick off many automatic scans that identify and explain vulnerabilities. If a simple Burp Suite scan can find it, an experienced attacker can, too.
You gain access to these tools upon downloading Commando VM, and it’s essential to understand the application and breadth of use for each one. If not, you’ll have difficulty identifying vulnerabilities, understanding permission relationships, and assessing your environments — things that leave you open to attack. However, the first step is knowing how to access them, which we’ll cover next.
Commando VM Installation & Configuration
At this point, we’ve explored a high-level overview of Commando VM, why it is important, and some of the existing tools you can access upon installation. Next, we’ll cover the step-by-step installation and configuration of the platform.
Prerequisites
You can install Commando VM on a virtual or physical machine. However, I’d suggest using a virtual machine for ease of deployment, management, and use.. Virtual machines also allow you to take snapshots along the way and roll back from any issues you encounter.
To run Commando VM, you’ll have to meet some minimum requirements. For my testing, I used the following:
- 60 GB of storage space
- 2 GB of memory
However, if you look at the GitHub page, they recommend:
- 80+ GB of storage space
- 4+ GB of memory
- 2 network adapters
As stated earlier, the Commando VN package can be installed on Windows 7 SP1 or Windows 10, although Windows 10 allows you to install more features. In eithery case, ensure your system is fully patched. Also, take a snapshot before beginning the installation process.
Commando VM Installation
You can download Commando VM from GitHub here.
Once downloaded, Commando VM is installed in three simple steps:
- Start an elevated PowerShell.
- Set the execution policy to unrestricted with the following command (by default, it is disabled): Set-ExecutionPolicy unrestricted.
- Run the ps1installation script in the commando-vm-master package:
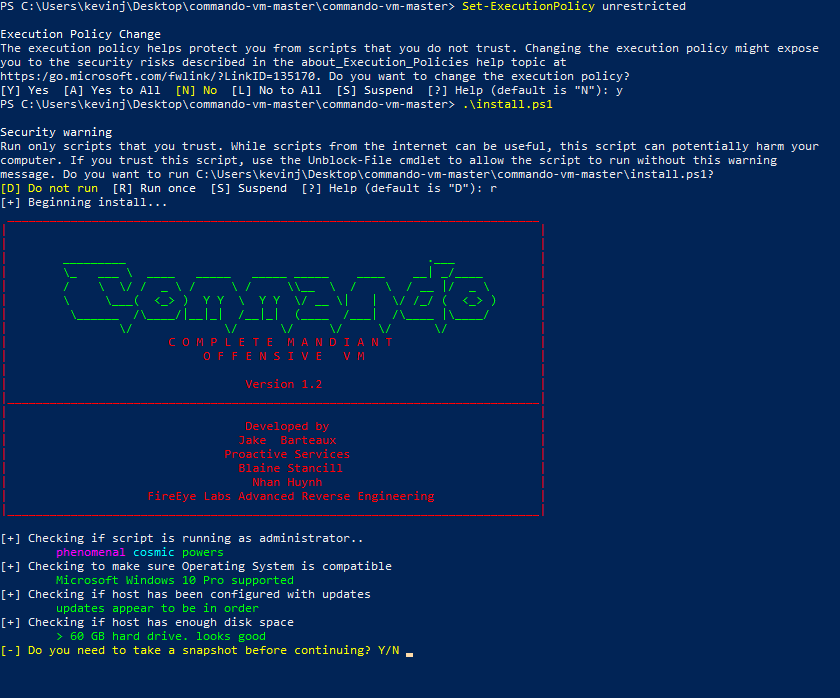
Commando VM Configuration
As you can see, as the installation script executes, it runs some checks and asks if you’d like to take a snapshot before installation. After each reboot, it will request your credentials to log in and continue installation. During the process, the PowerShell window will update you on what it is installing. You’ll also see various popups for software being installed automatically. Commando VM removes or disables many features that come prepackaged with Windows, since they aren’t needed on a machine used for penetration testing.
The whole process takes roughly an hour and a half from start to finish, with five or more reboots. Each reboot takes 10 to 15 minutes, at which point it starts back up, auto-logs in, and continues to install more applications. Depending on your virtual machine’s resources and internet speed, the process may be shorter or longer. You’ll know it’s complete when it logs you back in with a new background and command prompt. Again, take another snapshot so you can start fresh if needed.
Once you’ve gone through the installation and reboot process, you can look through the various tools. Then, you can configure your setup to reflect your needs and concerns.
Overview of Included Tools
As noted earlier, Commando VM includes a lot of tools. In fact, during the installation process, over 2GB of tools were installed on our hard drive. Luckily, the tool list is broken up into categories, making it easy to find the one you need:
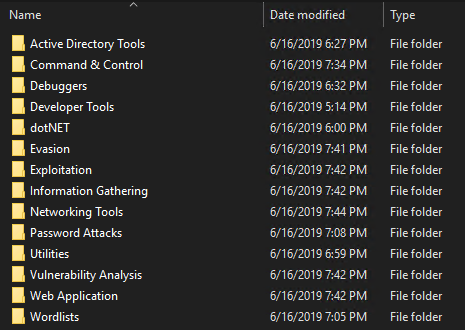
Here are some of the tools I find particularly interesting:
- Active Directory Tools
- Remote Server Administration Tools (RSAT)
- SQL Server Command Line Utilities
- Sysinternals
- Information Gathering
- BloodHound
- nmap
- ADACLScanner
- Networking Tools
- WireShark
- Exploitation
- PrivExchange
- Invoke-ACLPwn
- metasploit
- Password Attacks
- DSInternals
- hashcat
- DomainPasswordSpray
- mimikatz
- ASREPRoast
- Vulnerability Analysis
- Grouper2
- zBang
- Web Application
- OWASP ZAP
- BurpSuite
FAQ
What is FireEye Commando VM?
Commando VM is a testing platform created by Mandiant FireEye for penetration testers who are more comfortable with the Windows operating system.
How long does Commando VM take to install?
Installing Commando VM takes around an hour and a half.


.png)